
It’s easier than ever to create an event website. You’ll find several design templates and other tools available online to start building awareness of your event while providing an attractive destination that’s responsive and easy to navigate.
Before you can finalize your event website, several crucial factors must be considered if you want the site to communicate effectively with each visitor. Once you’ve secured the appropriate processes and tools for building your online presence, it helps to know how to use them appropriately.
This guide will take you through what you need when you want to know how to create an event website.
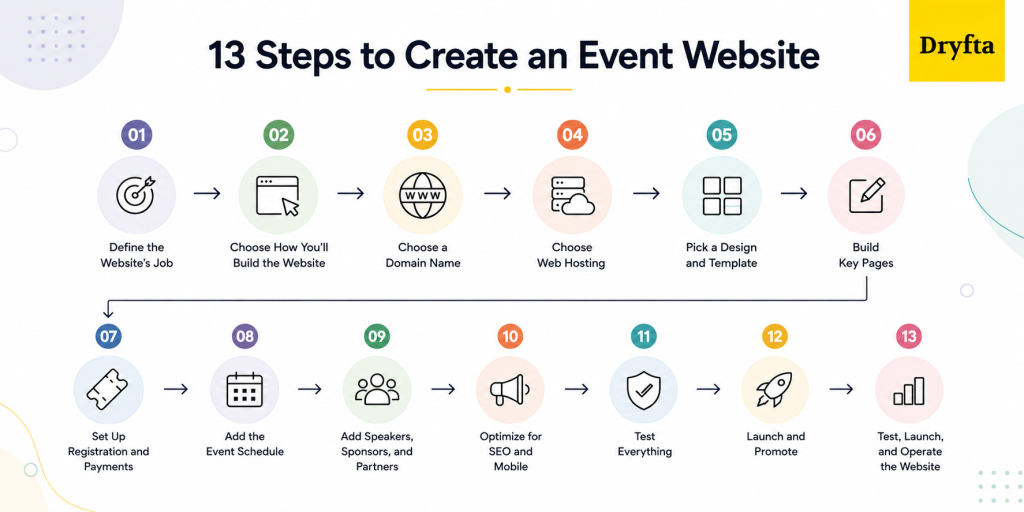
Step 1: Define the Website’s Job
We know it’s tempting to jump straight into the design, but hold off for a minute. The first thing to figure out is what your website needs to do.
Knowing how to create an event website starts with one fundamental question: What should visitors do when they land on it?
An event website might need to:
- Get people to register or buy tickets
- Collect abstracts, papers, or speaker proposals
- Display a full academic conference or multi-track schedule
- Bring in sponsors and exhibitors
- Help registered attendees find important event information
- Encourage networking or meeting requests
- Publish recordings or proceedings
- Drive memberships or donations
Here’s what works: Give your event website one primary goal and no more than two secondary goals.
Trying to make your site do twenty things at once just leaves visitors confused.
| Event type | Main action | Supporting action |
|---|---|---|
| Paid conference | Buy a ticket | Join the email list |
| Academic conference | Register | Submit an abstract |
| Nonprofit event | Register or donate | Sign up as a volunteer |
| B2B event | Register | Request a meeting |
| Association meeting | Register as a member | Ask about membership |
Simply put, if you’re building an academic event website, registration might be the main goal while abstract submission supports it. For a paid conference, ticket sales might come first, while email signups give visitors another way to stay connected.
As you’re learning how to create an event website, don’t try to turn every action into a CTA.
Step 2: Choose How You’ll Build the Website
Once you know what your website needs to do, the next step is deciding how you’re going to build it. To make the decision easier, here’s a side-by-side comparison of the main options.
| Build option | Best fit | Biggest advantage | Things to keep in mind |
|---|---|---|---|
| Event management platform | Conferences with registrations, schedules, and attendee management | Keeps everything in one place | Less freedom to customize the design |
| Website builder | Smaller events where design is the priority | Fast and easy to launch | You may need extra tools for registrations and other event features |
| CMS such as WordPress | Content-heavy events with lots of pages and resources | Great for content, SEO, and publishing | Takes more time to set up and maintain |
| Custom development | Events with unique or highly specific requirements | Complete control over every feature | Higher cost and ongoing maintenance |
| Marketplace event page | Small or one-time events | The quickest way to get online | Less control over branding and attendee data |
Forget old-school methods like hand-coding in Dreamweaver or pushing files over FTP. Modern event site setups live and breathe in cloud-based software built for instant publishing.
If all you need is a website with event details and a few photos, a general website builder will do the job. But if you want your website to work hand in hand with registrations, abstract reviews, speaker profiles, schedules, and attendee information, Dryfta is hands-down your best option.
You may still need custom development for a highly unusual or completely bespoke experience. But there is little point in adding extra technical work just because it sounds impressive. Pick the setup that matches what your event truly needs.
Step 3: Secure the Domain, Ownership, and Website Setup
A good-looking website is a nice-to-have. A website that suddenly goes offline because nobody knows who owns the domain? Now that’s a problem nobody wants.
If you are learning how to create an event website, sort out the basic ownership and security pieces before you launch.
Make sure you have:
- A branded domain or event subdomain
- HTTPS enabled
- Clear ownership of the domain, DNS, and hosting account
- One person responsible for renewals
- Admin access based on each person’s role
- A backup and recovery plan
- Regular security updates
- Protection against spam through forms
- Clear responsibility for payment providers
- Proper ownership of analytics and consent settings
Before you publish, check that the right people can access the right accounts and that you can recover the website if something goes wrong.
For anyone figuring out how to create an event website, the rule is: never launch without knowing who owns the domain, who can access it, and how the site can be recovered.
Step 4: Choose Between a One-Page and Multi-Page Website
Should you build a one-page website or a multi-page website? There’s no right answer for every event. It all comes down to how much information your visitors need and how easy you want it to be to find.
That’s one of the first decisions you’ll make when learning how to create an event website.
One-Page Website
Single-page layouts work like a charm when you want attendees to absorb information fast and register immediately.
It is a good fit for:
- The event is small or runs for a short time
- There is one main audience
- The agenda is fairly simple
- You have one main action, such as registering or buying a ticket
- Attendees do not need to browse through lots of information
The ideal single-page flow:
- Event value or main reason to attend
- Date, location and event format
- Reasons to attend
- Agenda highlights
- Speakers
- Testimonials or other proof
- Pricing
- Venue and access details
- FAQs
- Final registration button
Think about it from your visitor’s perspective. Your website should help visitors get to “Yep, I’m in” as quickly as possible.
Multi-Page Website
If you have multiple tracks, a big speaker lineup, abstract submissions, sponsors, or a lot of attendee information, squeezing everything onto one page can get very confusing for your visitors.
A multi-page site is usually a better fit for:
- Multi-day conferences
- Events with multiple tracks or session types
- Academic conferences with abstract submissions
- Large speaker or presenter lists
- Sponsors and exhibitors
- Different attendee groups
- Venue, travel, and accessibility information
- Past-event content, recordings, or proceedings
You do not need a menu with fifteen options, either. Keep the main navigation focused on the pages people will come back to.
Step 5: Build a Homepage That Answers Five Questions
When someone lands on your event homepage, they should quickly understand five things.
- What is the event? Tell people what they’re signing up for in one or two sentences.
- Who is it for? Let people know if this event is the right fit for them.
- What will I gain? Show them why attending is worth their time.
- When and where is it? Place the important details where nobody can miss them.
- How do I participate? Make the next step obvious, whether that’s registering, buying a ticket, or submitting an abstract.
Start With a Clear Hero Section
Your first event page should give visitors the important details right away.
Include:
- The specific event name
- A headline focused on the audience and what they can gain
- The date, venue, and format
- A primary registration CTA
- A secondary “View Program” CTA
- A trust signal such as a testimonial
Someone landing on the page should know within a few seconds whether the event is relevant to them.
Put Decision-Making Information Next
Once your visitors know what the event is, give them enough information to decide whether it is worth attending.
Include:
- Key benefits of attending
- Important agenda highlights
- Featured speakers
- Networking opportunities
- Testimonials or evidence from previous events
- Pricing and important deadlines
- Sponsor or partner credibility
- Venue and travel details
- FAQs and contact information
Step 6: Create Content People Can Act On
Your event content should help people make a decision or take the next step. Keep the writing simple and specific to the people you want at the event.
Make sure visitors can find:
- What the event is about
- Who should attend
- What they will learn or gain
- What is happening and when
- How much it costs
- How to register or participate
- Where to get help if they have questions
Here’s a format you can build on: For [audience], [event name] is a [format] that helps participants [primary outcome] through [program differentiators]. Join us on [date] in [location/online] to [specific benefit].
You can then adapt it to different types of events.
- Academic event: For researchers and academics, [event name] brings together experts to share research and explore the latest work in [topic]. Join us on [date] in [location/online].
- Nonprofit event: For supporters and community members, [event name] is a chance to come together around [cause] and find practical ways to get involved. Join us on [date] in [location/online].
- Corporate event: For [industry/team type], [event name] is a business event designed to help participants [primary outcome] through expert sessions and practical discussions. Join us on [date] in [location/online] to learn and connect.
Step 7: Design the Registration Journey
Your event registration workflow looks like this: Visitor → Event value → Ticket choice → Registration form → Payment → Confirmation
Make Ticket Choices Easy to Compare
- Show ticket types side by side where possible
- Include the full price and any fees
- Highlight early-bird deadlines
- Explain what each ticket gives access to
- Use one obvious registration action
Keep the Registration Form Short
- Enable autofill where possible
- Use sensible input types on mobile
- Show errors beside the relevant field
- Let people continue as guests when appropriate
- Consider saving incomplete registration progress
Do Not Stop at Payment
- Keep the payment process accessible
- Show what happens if payment fails
- Send a confirmation email immediately
- Provide a receipt or invoice
- Let attendees add the event to their calendar
Also, track form starts, field errors, payment failures, and completed registrations so you can see where people are dropping out.
Step 8: Make the Website Mobile-First and Accessible
Your event website should work just as well on a phone as it does on a desktop. Build accessibility into the site from the start. Use clear headings and descriptive links.
- Make forms and buttons easy to use with a keyboard or touch
- Keep focus states visible and text easy to read
- Add captions and transcripts wherever needed
- Use enough color contrast and never rely on color alone
- Make forms and error messages easy to understand
- Avoid autoplaying audio
- Make sure users can zoom without losing important functions
- Keep help and contact options easy to find
Step 9: Make the Site Fast and Technically Stable
A beautiful-looking event website is not much use if it takes forever to load. Keep the site responsive and easy to use on both phones and desktops.
- Use responsive images at the right sizes
- Prefer WebP or AVIF where supported
- Set image width and height to reduce unexpected page movement
- Use srcset and sizes so browsers can load suitable images
- Keep the main hero image loading quickly
- Avoid heavy autoplay videos and unnecessary third-party scripts
- Use caching and a CDN where appropriate
- Keep fonts and font files under control
- Test performance with real user data
Google currently uses three Core Web Vitals to measure loading, interaction, and visual stability. Aim for LCP of 2.5 seconds or less, INP of 200 milliseconds or less, and CLS of 0.1 or less at the 75th percentile across mobile and desktop visits.
| Metric | Good target |
|---|---|
| Largest Contentful Paint (LCP) | ≤ 2.5 seconds |
| Interaction to Next Paint (INP) | ≤ 200 ms |
| Cumulative Layout Shift (CLS) | ≤ 0.1 |
And don’t stop at a one-time speed test. Real-user data can reveal problems that lab testing misses. You can use Google’s Core Web Vitals guidance to check how your site is performing and where it needs work.
Step 10: Optimize the Event Website for Search
Once your site works well for visitors, make it easy for search engines to understand too. The secret to event website SEO isn’t trying to rank every page for every keyword. Give each page one clear purpose instead.
- Write a useful title and H1 that match the page
- Keep URLs short and descriptive
- Add benefit-focused meta descriptions
- Link related pages together naturally
- Use crawlable HTML links
- Add canonical tags and an XML sitemap
- Write useful alt text for images
- Include relevant location and event topics
- Link to speakers, partners, and related pages
- Update outdated dates and information
- Keep useful pages from past events instead of deleting them
- Use Search Console to spot problems and opportunities
- Give each page one main search intent
Add Event Structured Data
Part of learning how to create an event website is making it easier for Google to understand your event. One way to do that is by adding Event markup to a dedicated event page with accurate event information.
Here’s what you don’t want to miss:
- Give every event its own URL and markup
- Keep the event name, dates, times, and location accurate
- Use the correct time zone for the event
- Update eventStatus when an event is cancelled or rescheduled
- Use separate event markup when different performances or sessions have separate tickets
For the full implementation rules, check Google’s Event structured data documentation.
Step 11: Use AI Without Publishing Unreliable Event Information
AI can save a lot of time when you’re building event content. The trick is knowing where to let it help and where a human needs to take over.
Use AI to:
- Draft a few headline options for the same event
- Turn a long agenda into shorter session summaries
- Create an initial FAQ from common attendee questions
- Adapt landing-page copy for different audiences
- Translate a first draft before human review
- Suggest descriptions for event images
- Group similar feedback from attendees
- Flag dates or names that seem inconsistent
- Create test cases for forms and registration pages
- Prepare a first version of structured data markup
Keep a human check on anything that could affect what attendees actually do or expect:
- Event dates and time zones
- Speaker names and titles
- Venue and travel details
- Ticket prices and deadlines
- Accessibility information
- Refund policies
- Sponsor claims
- Translations
Use AI as a drafting and checking assistant, not as the final source of truth. Review anything that affects what attendees will pay, where they need to go, when they need to arrive, or what they can expect.
It’s also worth understanding the risks of AI in event management before you start relying on it for event-related work.
Step 12: Install Analytics and Build a Conversion Dashboard
More visitors don’t automatically mean more registrations. What people do after they land on your website matters just as much.
Track:
- Unique visitors who are likely to register
- Clicks on registration buttons
- People who begin the registration process
- Registrations that are successfully completed
- Visitors who leave during checkout
- Failed payment attempts
- Registrations attributed to each traffic source or campaign
- Conversion differences between mobile and desktop
- Engagement with the agenda and speaker pages
- Ticket or registration category choices
- Calendar-add actions
- Errors that stop people from completing forms
- Searches that return no useful results
- Core Web Vitals performance
- Questions and requests sent to support
Registration conversion rate = completed registrations ÷ qualified event website visitors × 100
Step 13: Test, Launch, and Operate the Website
Before launch, test the actions people will use, especially registration, payment, accessibility, and event updates.
Prelaunch checklist
Run through the site as if you were an attendee, speaker, sponsor, and event organizer. Check:
- Registration and payment flows
- Confirmation emails and calendar files
- Promo codes, refunds, and cancellation information
- Dates, times, and time zones
- Mobile forms and keyboard behavior
- Screen-reader labels and keyboard-only navigation
- Color contrast and other accessibility details
- Search, filters, and 404 pages
- Structured data and social previews
- Analytics events and consent controls
- Page speed, backups, and recovery
- Emergency or cancellation messaging
A quick tip: do not stop at “The website works.” Try completing real tasks from start to finish.
Soft launch before going fully live
A soft launch gives a small group of people a chance to use the site before everyone arrives. Ask representatives from event operations, marketing, finance, accessibility, speakers, attendees, sponsors, and IT or security to complete realistic tasks.
Give each person something specific to do rather than asking them to simply “review the website.” Their real-world feedback can reveal broken links, confusing forms, missing information, payment issues, or accessibility barriers before launch day.
Treat the Website as Three Different Products
Your visitor’s needs change depending on when they click on your website.
| Stage | What visitors need | What the website should provide |
|---|---|---|
| Before the event | Decide and register | Event value, speakers, agenda, tickets, travel details |
| During the event | Navigate and participate | Live schedule, updates, venue information, access links |
| After the event | Revisit and continue | Recordings, slides, proceedings, surveys, next-event information |
Once your event is over, don’t be too quick to take your website offline. Keep the useful pages up, add post-event content, and point visitors to what comes next.
Common Event Website Mistakes
Even a well-designed website can make things harder than they need to be. Here are some common mistakes to avoid:
- Starting with the design before you’ve decided what the website needs to achieve.
- Giving your event a generic description instead of explaining why people should attend.
- Making visitors hunt for important information.
- Sending visitors to different websites just to complete simple tasks.
- Asking for too much information during registration.
- Treating the mobile experience as an afterthought.
- Packing pages with content that slows everything down.
- Overlooking accessibility when building your website.
- Leaving out structured data that helps search engines understand your event.
- Publishing AI-generated content without checking it first.
- Tracking website visits without measuring meaningful actions.
- Taking the website offline as soon as the event ends.
- Leaving outdated event information on the website.
- Burying important information inside PDFs.
How Dryfta Supports the Complete Event Website Workflow
You shouldn’t have to jump between different platforms just to keep your event running. With Dryfta, the different parts of your event stay connected in a single platform.
| Website need | How Dryfta helps |
|---|---|
| Branded event website | Build a fully branded website with customizable themes and layouts. |
| Registration | Create registration forms, ticket types, payment collection, invoices, and confirmations. |
| Academic workflows | Collect abstracts, manage peer review, and track submissions from start to finish. |
| Program publishing | Publish sessions, tracks, speakers, and personalized schedules. |
| Attendee management | Organize attendee data with built-in CRM and audience segmentation tools. |
| Engagement | Keep attendees involved with polls, Q&A, meetings, networking, community features, and the event app. |
| Access control | Control what is visible to the public and what is available only to registered attendees. |
| Reporting | Monitor registrations, attendee activity, and event performance with built-in reports. |
Book a free demo to see how Dryfta can help you build an event website where registration, abstracts, speakers, schedules, attendees, and engagement all stay connected.
Frequently Asked Questions
1. What should an event website include?
An event website should explain what the event is, who it is for, when and where it will happen, and how people can register. It should also include the agenda, speakers, ticket details, venue information, FAQs, contact details, and clear call-to-action buttons so visitors can quickly find everything they need.
2. How do I create an event website without coding?
You do not need coding skills to create an event website. Many event website builders and event management platforms provide ready-made templates that you can customize. Add your logo, event details, speakers, tickets, and registration form, then publish the website when everything is ready.
3. Should an event website be one page or multiple pages?
A one-page website works well for small events with limited information and one main goal. A multi-page website is better suited for conferences and larger events that include speakers, agendas, sponsors, registration, travel information, and multiple types of attendees.
4. How much does an event website cost?
The cost depends on the type of website you need. A simple website may cost very little, while larger websites with specialized event management features usually cost more. Always choose a solution that matches your event goals and budget.
5. When should an event website launch?
Launch your event website as early as possible so people have enough time to register, book their travel, submit abstracts if needed, and plan their visit accordingly. Publishing the website several months before the event also gives search engines time to index your pages and helps build awareness among your target audience.
6. How do I sell tickets on an event website?
Use an online registration and ticketing system that lets visitors choose ticket types and do payments. Keep pricing, deadlines, refund policies, and payment details easy to find so visitors can complete registration without any confusion.
7. How do I make an event website mobile friendly?
Make sure your website works just as well on a phone as it does on a desktop. Buttons should be easy to tap and forms should be quick to fill out. Keep the text easy to read and make sure pages load without taking too long. A mobile event app makes it much easier for visitors to register wherever they are.
8. How do I make an event website accessible?
An accessible website can be used by everyone, including people with disabilities. Use clear headings, readable fonts, image alt text, keyboard navigation, good color contrast, and simple forms. Making your website accessible creates a better experience for all visitors.
9. How do I add an event to Google Search?
Create a dedicated page for each event and add accurate event structured data. Make sure the event name, date, time, location, ticket details, and status are correct. Keeping your information updated gives search engines the best chance to understand and display your event.
10. What structured data should an event website use?
Use Event structured data on pages that describe a specific event. Include details such as the event name, date, location, organizer, and ticket information. Blog posts and other website pages should use structured data that matches their content instead of Event markup.
11. Can AI create an event website?
AI can help write website content, suggest headlines, create FAQs, improve descriptions, and organize information. However, people should always review important details like dates, ticket prices, speaker names, venue information, and registration deadlines before publishing the website.
12. What should happen to the website after the event?
Keep the website online after the event instead of deleting it. Add recordings, presentation slides, photos, event highlights, or recap articles. You can also update the website with information about your next event, helping returning visitors stay connected and improving your search visibility.