


Issuing participation certificates by hand was, for a long time, considered a perfectly acceptable inconvenience. A workshop with 50 attendees meant 50 copies of a Word document, each name typed individually, each PDF converted, and each email then composed and sent one at a time. For events of that modest scale, the process was tedious but proved survivable. However, increasingly, manual certificate generation is becoming unsustainable for event organizers around the globe. As an instance, a hybrid academic conference registering 10,000 or even a smaller-scale corporate webinar series running a few dozen sessions in a single calendar year, will barely be able to survive on manual means of generation a certificate of participation.
1EdTech inferred from its 2025 batch count that the number of digital badges issued grew remarkably from 74.7 million to 320.4 million in 2025 in just 3 years.
The numbers that support the obsoleteness of manual generation of certificate of participation and argue for automation in design are tough to miss.Issuing participation certificates by hand was, for a long time, considered a perfectly acceptable inconvenience. A workshop with 50 attendees meant 50 copies of a Word document, each name typed individually, each PDF converted, and each email then composed and sent one at a time. For events of that modest scale, the process was tedious but proved survivable. However, increasingly, manual certificate generation is becoming unsustainable for event organizers around the globe. As an instance, a hybrid academic conference registering 10,000 or even a smaller-scale corporate webinar series running a few dozen sessions in a single calendar year, will barely be able to survive on manual means of generation a certificate of participation. The numbers that support the obsoleteness of manual generation of certificate of participation and argue for automation in design are tough to miss.
Universities and associations running conferences and symposiums all find themselves facing the same fundamental pressure when it comes to participation certificates. That attendees expect their certificates quickly. The administrative burden of producing them manually is no longer a reasonable thing to ask of any team.
Automated certificate workflows address these pressures in a direct and measurable way. They:
- Remove data-entry errors
- Standardize design across every event an organization runs
- Reduce the volume of post-event support requests and
- Place a professional branded document in every attendee’s inbox within minutes of session completion.
As professional recognition requirements and continuing education obligations grow stricter across industries, verifiable certificates with QR validation have also, in ways, become compliance tools.
What to Look for in a Participation Certificate Generator
Heavily advertised and quick-to-use design platforms like Canva can push out some attractive output. But what they lack, when designing in large numbers, is automation. This is something that more all-in-one event management software like Dryfta skillfully tackle. In the section below, we’ll take a look at the features that you should be looking out for in a participation certificate generator.
Bulk Certificate Generation
A platform sturdy for deployment at scale must be able to accept CSV or Excel files with ease. The system must then access attendee names, email addresses, and any other session-specific data. Following this, the tool must populate a certificate template for each row automatically. Batch processing of certificates should be completed in a few minutes, requiring little involvement from your end.
Automated Certificate Delivery
Bulk certificate generation solves only half the problem. The rest of the puzzle rests with delivery automation, that is, being able to send each certificate to the correct recipient immediately after session completion or at a scheduled post-event time.
Certificate Design and Branding
Templates must support logo uploads, custom color schemes, font choices, and signature fields. For organizations that white-label their events, the certificate should carry no visible trace of the underlying software.
QR Verification and Security
A certificate without a verification mechanism is one a forger can replicate in ten minutes. QR codes linked to unique certificate IDs allow employers, academic institutions, and conference organizers to confirm authenticity in seconds. Platforms serious about security assign each certificate a tamper-evident identifier and log the issuance date, recipient name, and event details against that ID.
Integration Capabilities
Certificate generation rarely happens in isolation. Event management platforms, learning management systems, webinar tools, and CRM platforms all hold the attendance data that triggers certificate issuance. Native integrations or webhook support means organizer staff do not need to export and re-import spreadsheets between systems for every single event.
Hybrid and Virtual Event Support
Attendance verification for virtual sessions is a distinct technical requirement from what in-person events demand. Platforms built primarily for physical events often lack the session-completion tracking that webinar and virtual conference workflows depend on. The right tools can ingest attendance records from Zoom, Teams, or equivalent platforms and trigger certificates automatically based on session duration thresholds.
User Experience and Accessibility
A certificate builder used once per quarter by a conference administrator with no design background needs to be learnable in under an hour. Mobile-friendly download pages matter because a significant share of attendees will open their certificate email on a phone. Multi-language support is relevant for international events and associations with global membership.
Scalability and Pricing
Free plans and entry-level tiers cover one-off events and small cohorts reasonably well. The pricing questions worth asking at volume are whether the platform charges per certificate or per subscription, whether automation features are locked behind enterprise tiers, and whether the cost structure remains sensible at ten thousand certificates a year versus one hundred.
Analytics and Reporting
Certificate issuance reports, download rates, email open rates, and verification activity give organizers data they actually need: how many attendees collected their certificate, which sessions saw the most participation, and whether the distribution workflow functioned correctly. Platforms that treat analytics as an afterthought make post-event reporting harder than it needs to be.
Create Certificate of Participation: Best Certificate Generators in 2026
In this section, we’re reading into the lines of the top 5 platforms competing in the participation certificate market now. We’ve delineated the pros, cons, and best use cases for each platform to aid comparative decision-making. All platforms appear promising at first glance. However, it is important to look a little deeper than superficial outward appearances to better ascertain the right platform for your certificate generation needs.
Dryfta
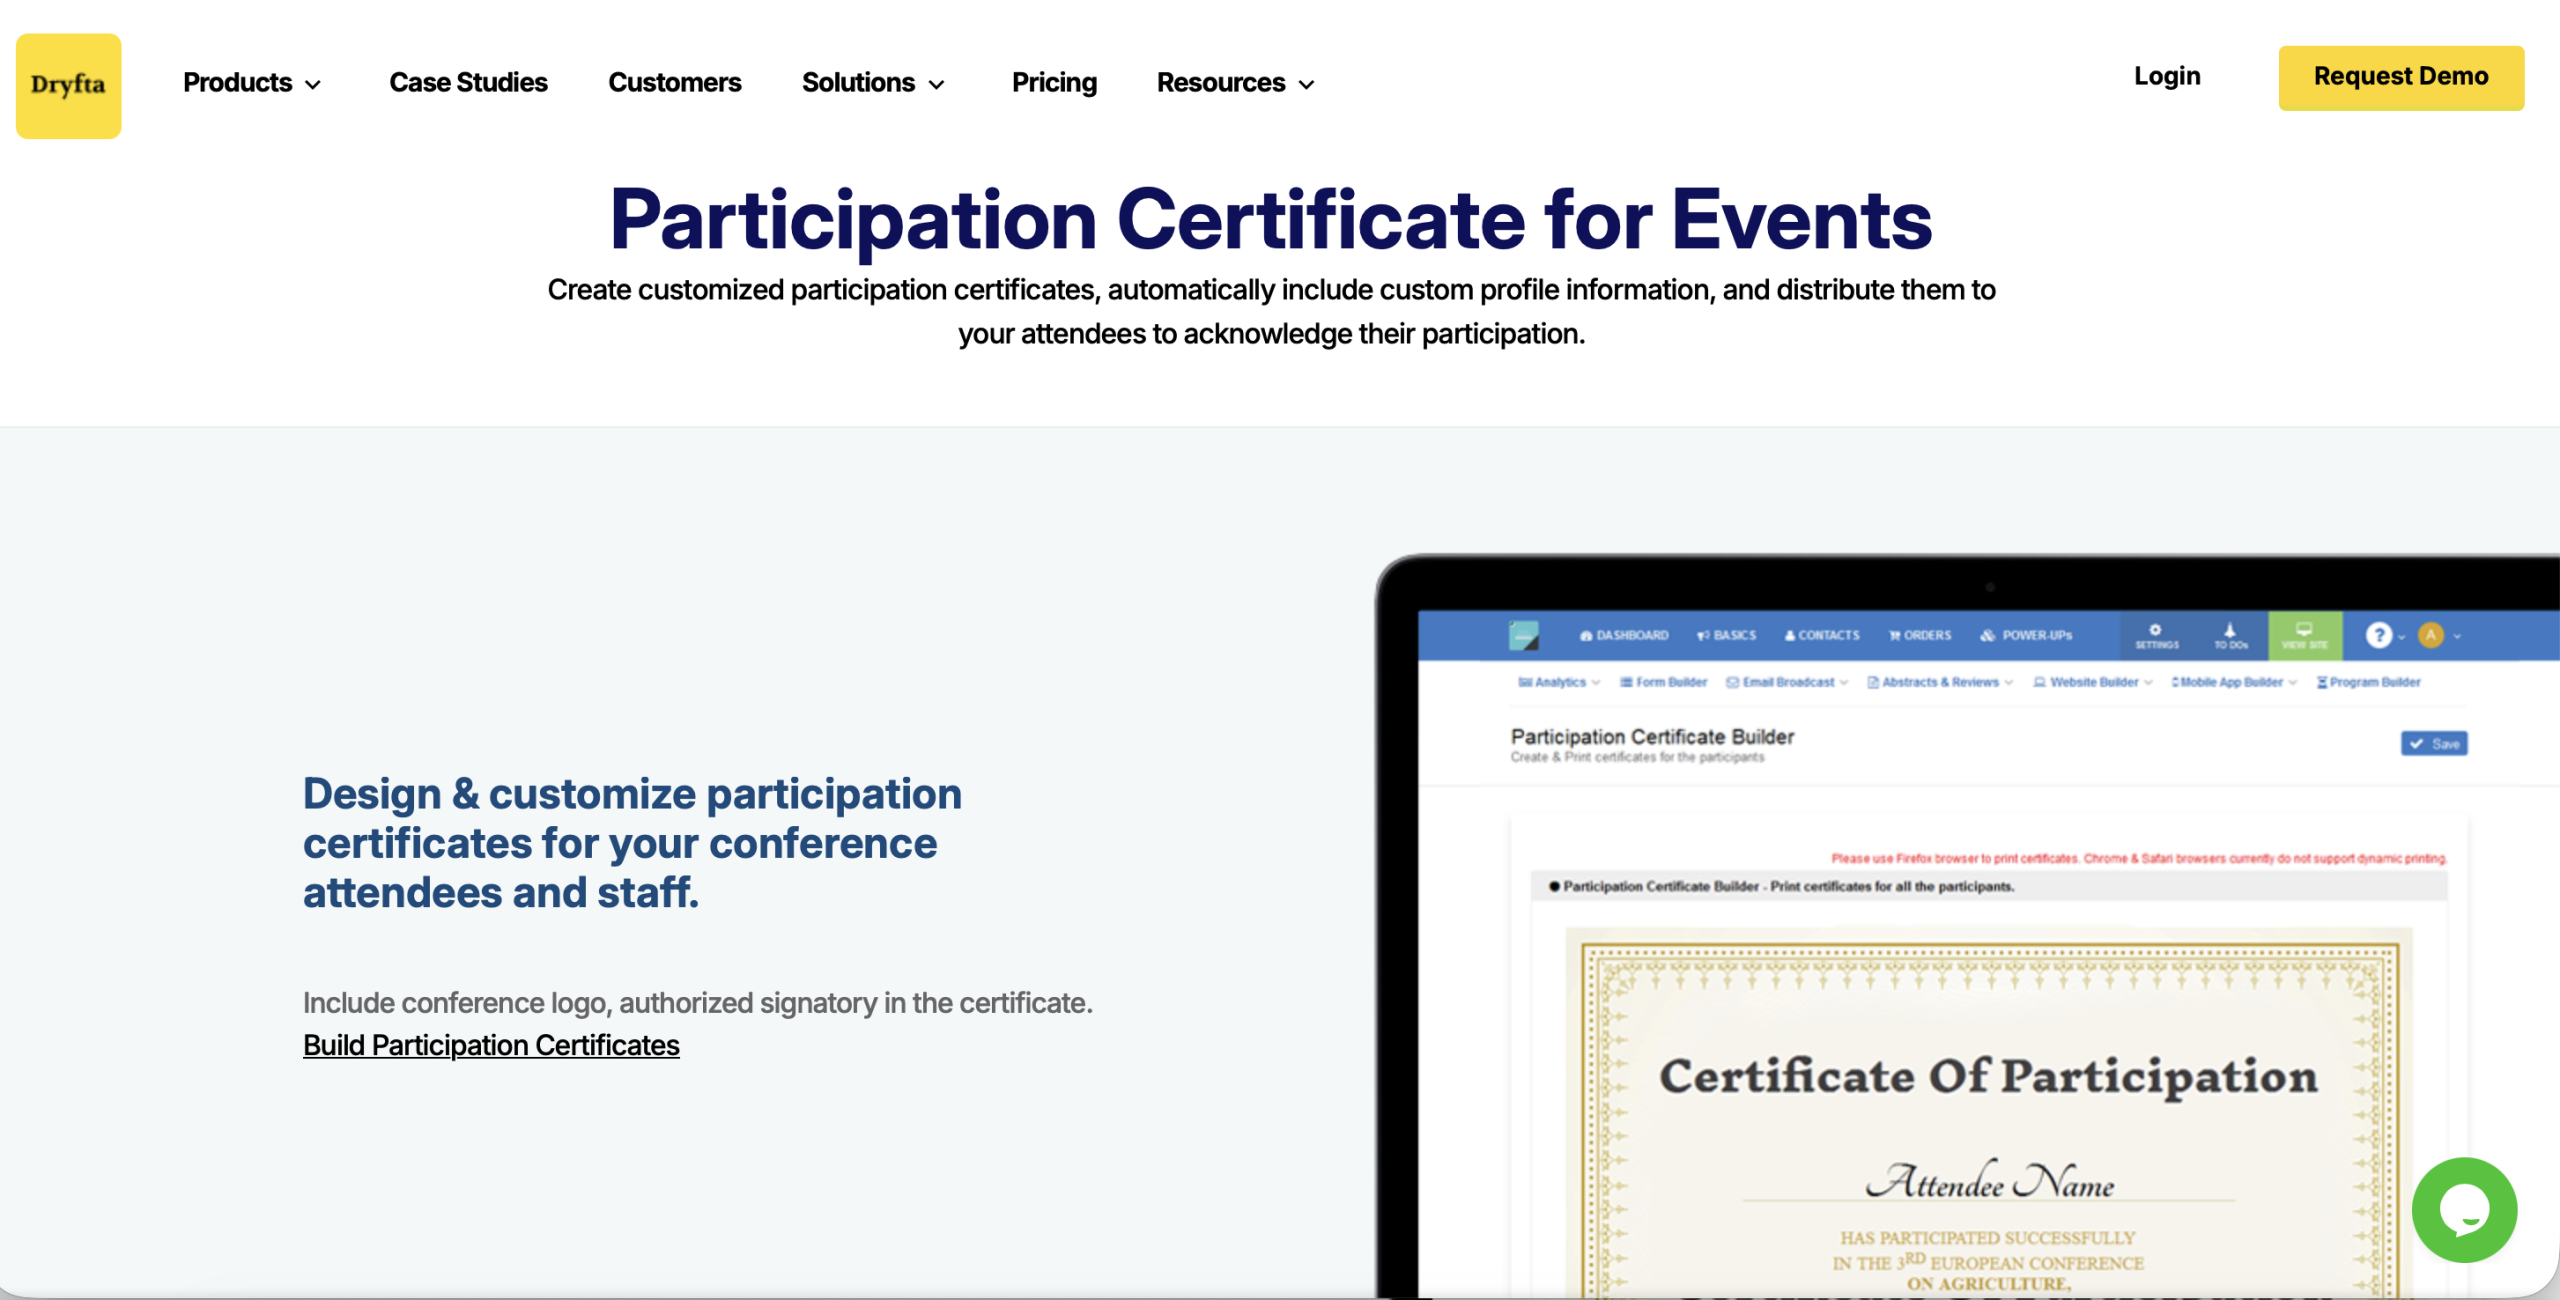
Best For: Academic conferences, professional associations, and university events that manage the full event lifecycle within a single platform.
Dryfta is an event management platform built specifically for universities, non-profits, and academic associations. Its Participation Certificate Builder sits inside the same dashboard used for registration, session scheduling, and abstract management. Organizers can upload a logo, set fields for name and session, and include authority signatures to generate a complete batch of certificates in under minutes.
Key features
- Bulk certificate generation: Information for certificate printing imported from contacts and registered attendees.
- Certificate Builder: A mechanism equipped with customizable templates per your needs.
- Automated email delivery: Certificates are generated and delivered in bulk to attendees via mail.
- Self-service dashboards: Features for attendees to download certificates on their own.
- Support for multiple attendee types: This includes customer support for speakers, presenters, and general delegates associated with the event.
- Integration with Dryfta: The participation certificate builder, like all other functions within Dryfta, integrates natively with the abstract and registration modules.
- QR-based attendance tracking: The platform also supports QR-based attendance tracking at the session level. This can be a trigger for certificate issuance.
When to choose: Choose Dryfta when certificate generation is only one component of your larger event management needs. Dryfta is the perfect choice if your organization needs abstract submission, networking, and registration under one roof. Look elsewhere when your only need is generating and emailing certificates for an event.
Certifier
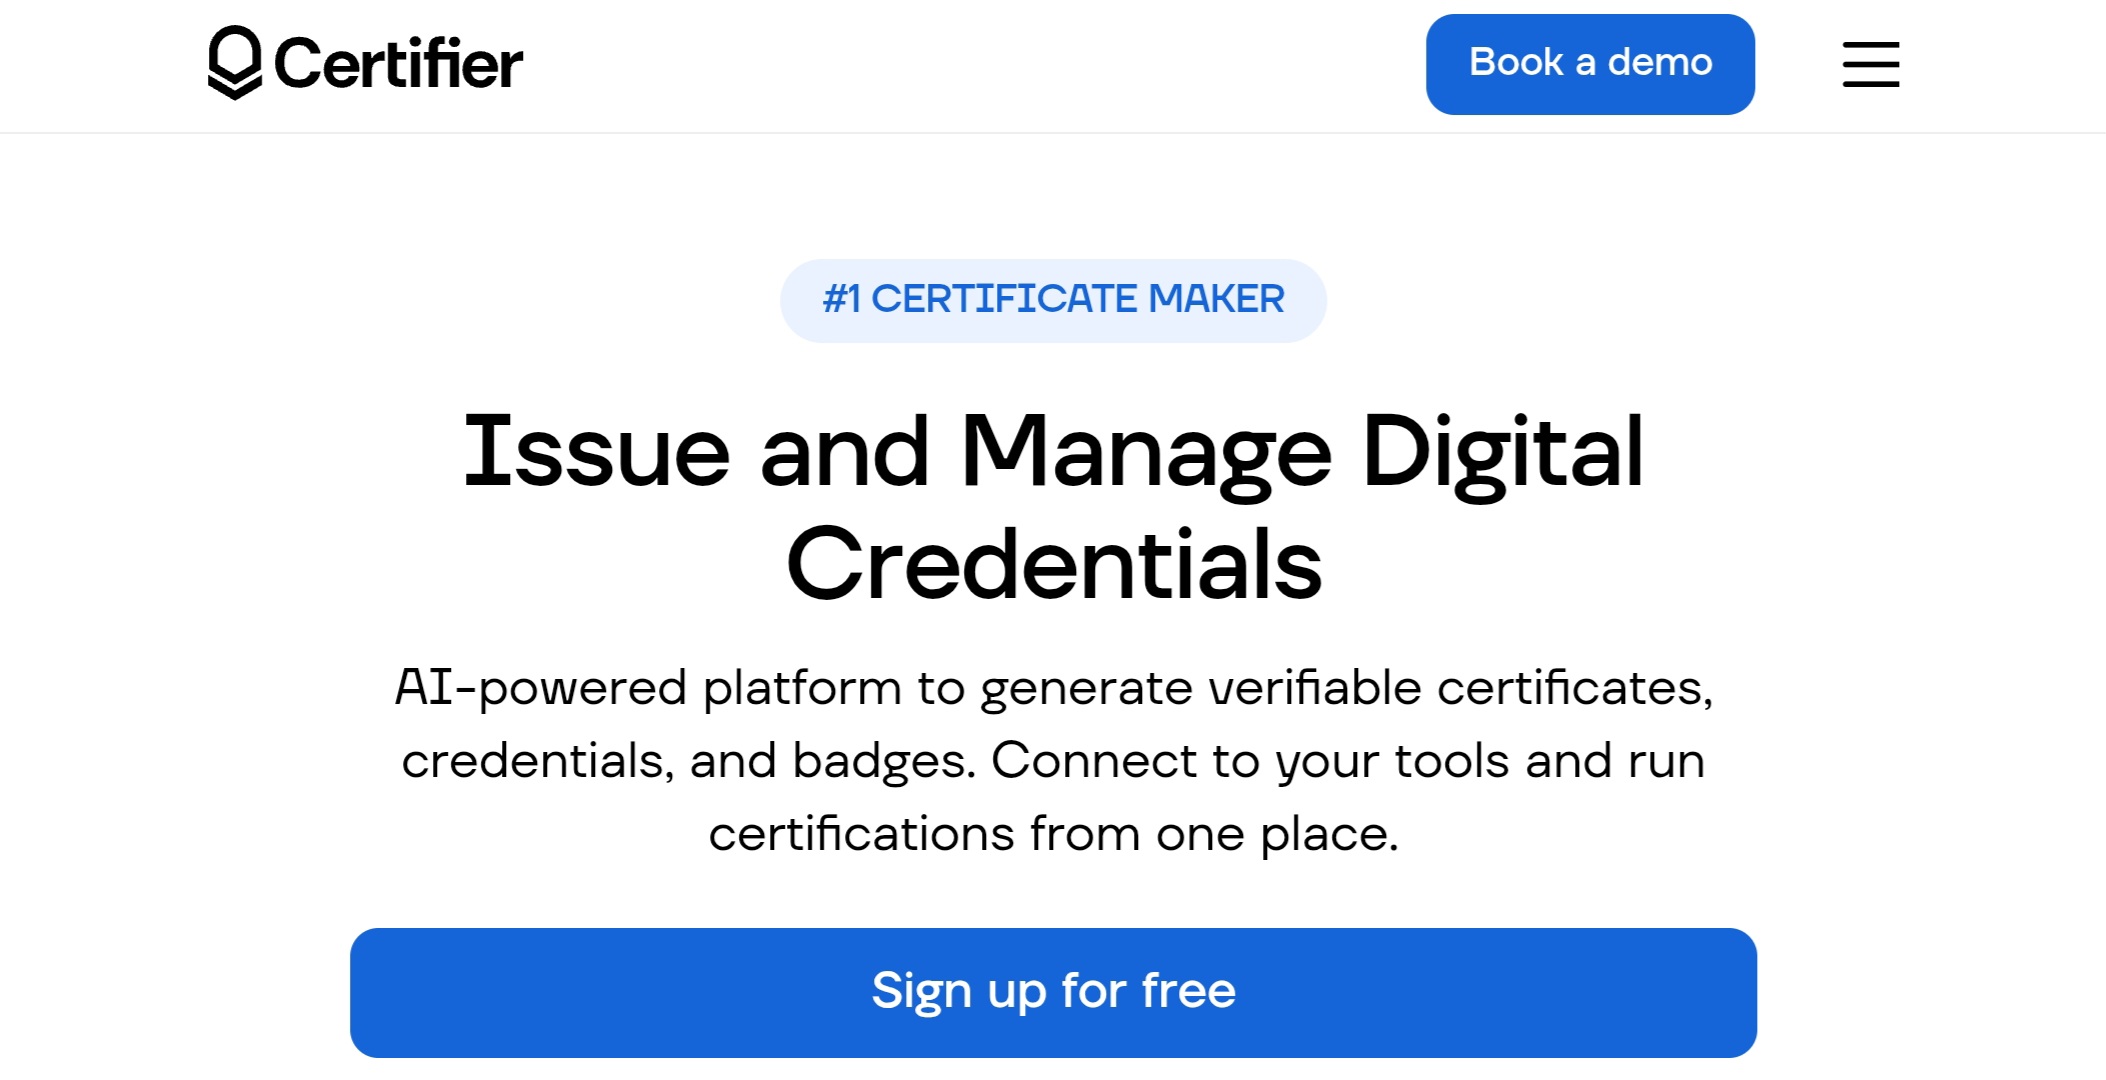
Best For: online course platforms, professional development programs, and organizations that issue certificates at high volume and want strong digital credential sharing and QR verification.
Certifier is one of the leading credentialing platforms and has earned consistent praise for its ease of use and the speed at which organizations move from signup to issuing their first batch. The platform covers design, issuance, email delivery, and LinkedIn-ready sharing in one workflow, making it particularly well-suited for course creators and training organizations whose participants actively share credentials for professional development purposes.
Key features
- Bulk generation with CSV upload
- QR-code certificate verification with unique certificate IDs
- Automated email delivery
- Template library with branding customization
- Certifier’s free tier supports up to 50 certificates covering small cohorts and pilot testing.
Limitations
- The cost can be a barrier for small nonprofits and community organizations running high-volume free events.
- The certifier does not offer the broader event management infrastructure, including features like registration, agenda building, and networking that platforms like Dryfta include.
When to choose: Certifier is the right choice for organizations whose primary need is a polished, automated credential-issuing workflow. It is not the best choice for event organizers who need certificate generation as part of a fully managed conference or symposium platform.
Mix Certificate
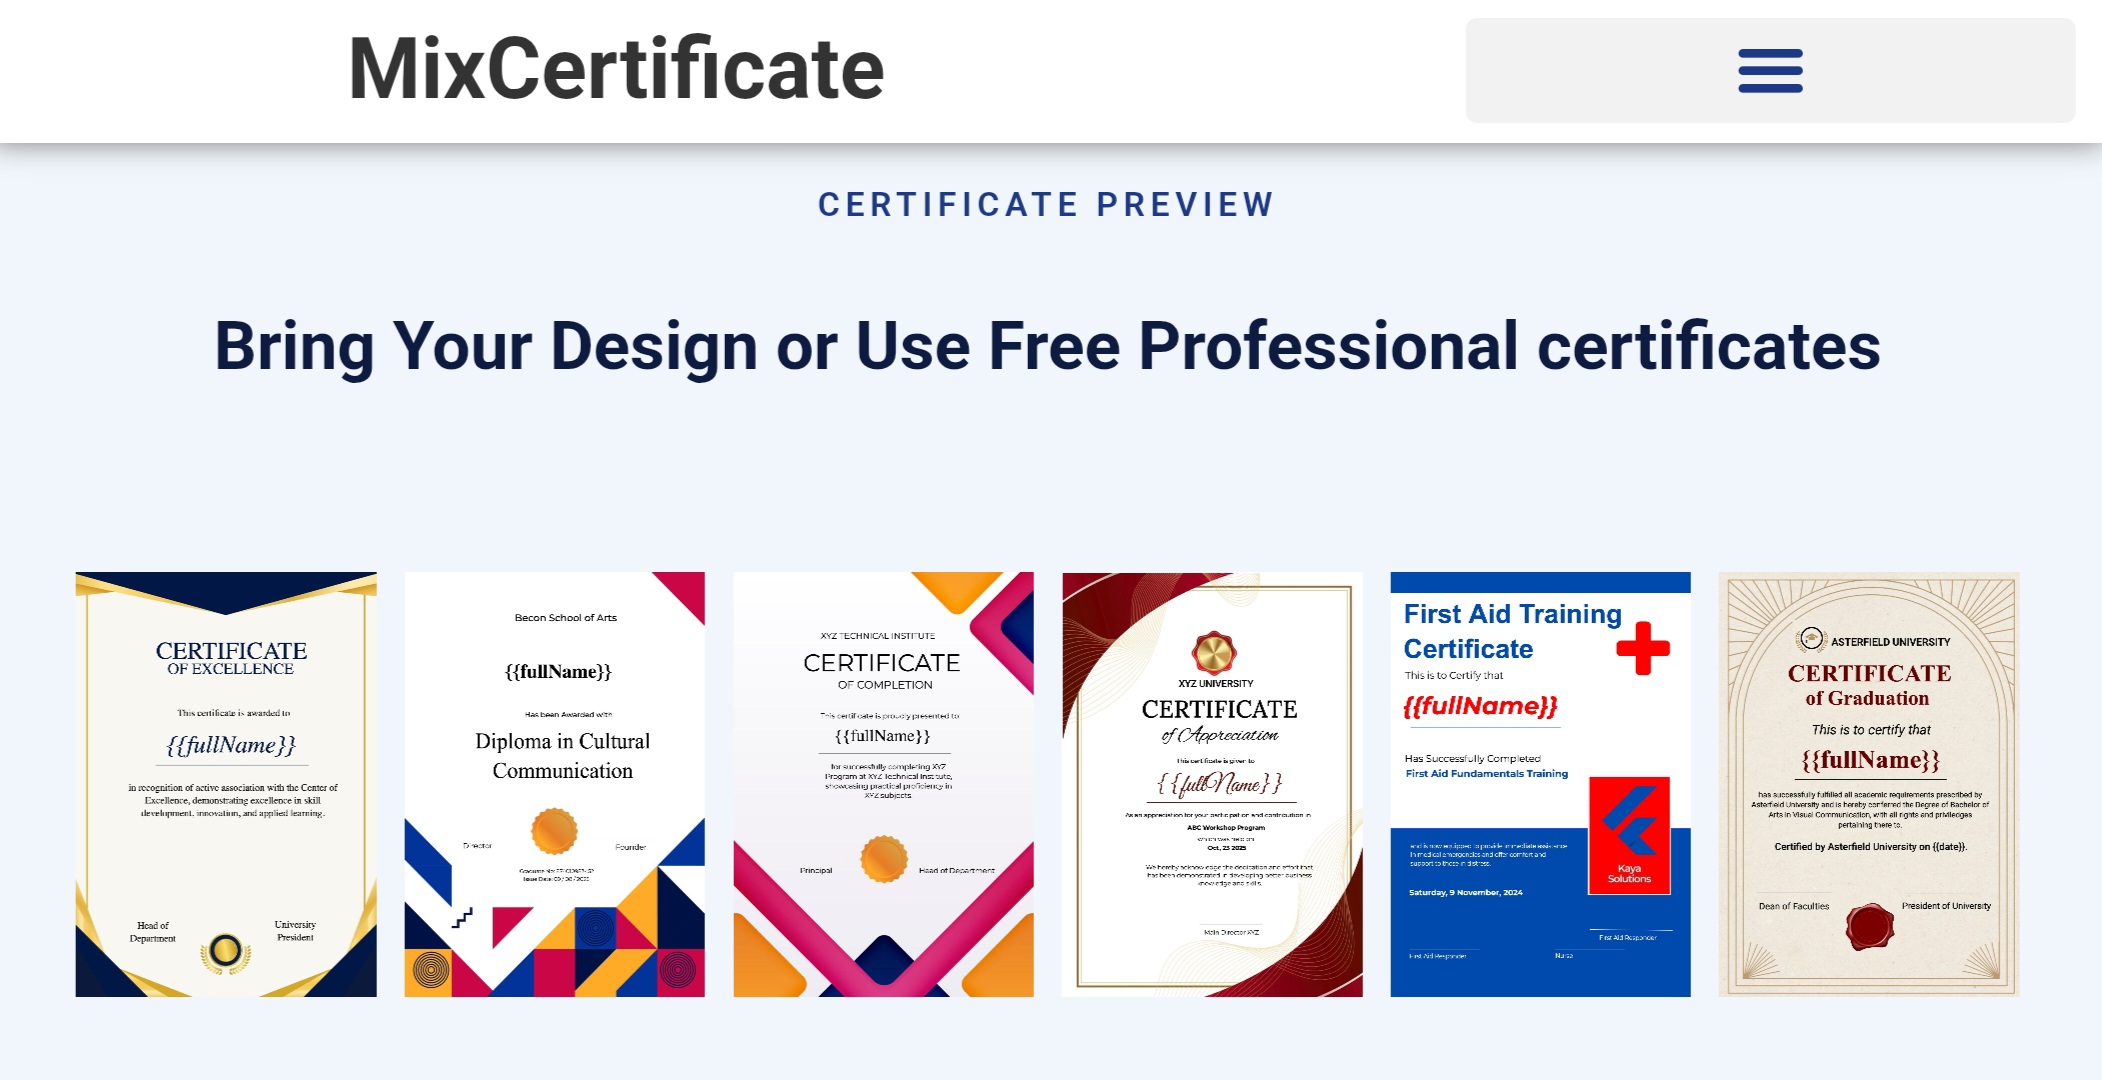
Best For: Educators, NGOs, training organizations, and event teams that need high-volume bulk certificate generation with built-in email sending, QR verification, and a white-label portal at a price point accessible to independent operators.
MixCertificate describes itself as a complete certificate ecosystem rather than a simple generator. The platform handles the entire lifecycle from design through delivery. A white-label subdomain option also allows organizations to present the certificate portal under their own domain.
Key Features
- Certificate export formats include PDF, JPEG, and PNG.
- Multi-user organization accounts allow different team members to design templates, run batches, and send certificates without sharing a single login.
- LinkedIn integration for certificate verification was listed as under active development as of mid-2025.
Limitations
- MixCertificate lacks the native event management infrastructure of Dryfta.
- It does not offer the depth of digital badge or open badge standards.
When to choose: MixCertificate is best suited for high-volume issuers like universities and businesses that want a dedicated certificate platform without paying enterprise pricing.
Zoho Backstage
Best For: Organizations already in the Zoho ecosystem that manage in-person, virtual, and hybrid events and want certificate issuance integrated into a full event management suite.
Zoho Backstage is an end-to-end event management platform with a commission-free ticketing system, customizable event websites, session management, and attendee tools. Since the Backstage 3.0 release in 2025, a certificate builder covering all attendee and exhibitor types has been available. The certificate workflow supports automated delivery via email, including a downloadable link embedded in post-event follow-up messages.
Key Features
- Session-based certificate issuance and RSVP management
- Tiered ticket pricing and SUNMI badge printing integration.
- The platform’s analytics dashboard extends to certificate issuance, and multi-language support makes it viable for global events.
Limitations
- For organizations managing one or two events annually, the subscription model may be of poor value if certificate generation is the only driver.
- G2 reviews note strong usability but a smaller review base than Dryfta or Certifier.
When to choose: Zoho Backstage is the right platform for organizations already using Zoho tools or running full event programs that need registration, networking, agenda management, and certificates from one system.
Canva

Best For: Small teams and individual educators who need polished certificate designs for one-off events or small cohorts and prioritize visual quality over automation.
Canva is a widely recognized design tool in the market and hosts an extensive template library. Its Bulk Create feature allows users to connect a spreadsheet to a certificate template and generate multiple personalized versions in one pass.
Key Features
- Design flexibility and variety
- AI-assisted template suggestions
- Variegated export options covering PDF, JPG, and PNG that give individual organizers strong creative control.
- The platform is free for standard single-certificate creation.
Limitations
- Bulk Create is paywalled behind Canva Pro, which starts at $120 per year.
- Canva offers no certificate delivery automation, no QR verification, no unique certificate IDs, and no issuance analytics.
When to choose: Canva suits best when your primary need is a one-off certificate design and your distribution volume is small enough to manage by hand.
Adobe Express
Best For: Designers and creative teams who want AI-assisted certificate design with access to the Adobe creative ecosystem and are comfortable distributing certificates manually.
Adobe Express (formerly Adobe Spark) is a simple and easy-to-use design tool for users who want quick output. For certificates, the generative AI feature can produce a template from a text prompt, and access to Adobe Stock assets extends design options considerably. Its Bulk Create feature, unlike Canva’s, is available on the free plan. This is an advantage for teams with design needs but limited budgets.
Key Features
- Easy integration across the larger Adobe ecosystem.
- Useful for teams that already work across Photoshop, Illustrator, and Express.
- Template quality is high, and the interface is approachable for non-designers.
Limitations
- Adobe Express shares Canva’s core limitation in that there is no certificate delivery automation.
- There is neither QR verification nor issuance tracking. Certificates, therefore, ought to be downloaded and sent manually.
- It is primarily a design tool and not a credentialing system.
When to choose: It is wise to pick Adobe Express when your requirement is high-quality branded certificate design. If your team already works within the Adobe ecosystem, then it may be easier to adapt to for certificate generation.
Quick Comparison of the Best Participation Certificate Tools in 2026
Participation Certificates for Different Event Types
Different types of events warrant different documents to be issued to participants upon the event’s completion. The broad term ‘participant certificate’ encompasses at least a dozen unique variations. In this section, we’ll go over the most used formats by organizers of academic events, conferences, and B2B events.
XtendedView noted that over 60 million webinars are expected to be hosted globally in 2026.
- Webinar Participation Certificates: The aforementioned statistics point at webinar certificates as among the highest-volume bulk generations in the market today. Once a participant meets an attendance threshold, typically 60 to 80 percent of session duration, a certificate should generate and land in their inbox automatically. Effective webinar certificate workflows integrate directly with the webinar platform, pull attendance duration data, apply the threshold rule, and commence certificate generation. All with little manual intervention.
- Academic Conference Certificates: Academic conferences are frequently issuing many different types of participation certificates at once. These include documents such as participation certificates, speaker presentation certificates, poster presenter certificates, session chair certificates, and, in some cases, reviewer acknowledgement. What organizers miss is that every one of these varieties carry with them starkly different content needs. Platforms with user-type segmentation, such as Dryfta, can handle this cleanly and fuss-free by linking certificate templates to registration categories.
- Workshop and Training Certificates: Certificate content for training contexts typically includes course name, completion date, number of continuing education credits or hours, instructor name, and an organization signature. Platforms that support custom field mappings allow training managers to pull all of this data from a registration form or LMS record into the certificate template without manual data entry.
- Virtual and Hybrid Event Certificates: Virtual and hybrid events require attendance verification mechanisms that differ meaningfully from in-person check-ins. Digital attendance logs, login records, and session data replace the physical registration desk. Certificate workflows for hybrid events ought to be able to process data across both online and offline sources with consistency. Issuing firms demand the same kind of branding and delivery mechanism for both certifications alike. Hence, it is important for the certificate generation mechanism to be able to tackle this head-on.
- Employee Training Certificates: HR and learning and development teams face certificate volume that often exceeds what event teams manage. Onboarding programs, annual compliance refreshers, technical certifications, and leadership development courses all generate certificate issuance requirements across the employee population. Integration with the organization’s LMS, or Learning Management System, is the priority. This is what allows certificates to trigger automatically when a course module is marked complete rather than having a separate staff mark it as complete.
How to Automate Participation Certificate Generation
There are, roughly put, about 5 clear and distinguishable individual steps involved in generating participation certificates in bulk. These steps, however, are only for the machinery. As manual organizers, all you’ll need to do is toggle the mechanism on and watch the magic perform itself. That is, if you choose a capable certificate generation entity like Dryfta, of course.
Step 1: Create a Certificate Template
Open the certificate builder in your chosen platform and upload the organization’s logo. Set the background to either a pre-built template from the library or a custom design. Add dynamic placeholders for the fields that will change with each recipient: name, event title, session name, completion date, and certificate ID. Add any static elements that remain constant across all certificates. These include things like organizer signature, organization name, event logo, and any accreditation or continuing education credit language. Save the template and assign it to the relevant event or course.
Step 2: Upload Attendee Data
If the certificate platform is integrated with your event management or registration system, attendee data populates automatically. If working from a standalone certificate tool, prepare a CSV or Excel file with one row per recipient and columns matching the dynamic placeholders in the template. Most platforms provide a sample CSV for download so the column headers match the template fields exactly. For events with multiple attendee types, create separate data files or use a user-type column to route recipients to the correct certificate template.
Step 3: Configure Automation Rules
Set the trigger for certificate generation. For webinars, the trigger is typically session completion at or above a defined attendance duration. For in-person events, it is check-in confirmation. For courses, it is module or course completion status from the LMS. Configure the email automation: subject line, message body, send time, and the format of the attached or linked certificate. Where the platform supports it, set up a self-service download link so recipients can retrieve their certificate independently if the original email is missed.
Step 4: Generate Certificates in Bulk
With the template set and data uploaded, initiate batch generation. The platform processes each row in the data file, populates the template with the corresponding values, and produces an individual PDF for each recipient. Preview a sample before triggering the full batch to catch any placeholder mapping errors, font rendering issues, or layout problems that a single-row test would reveal. Batch sizes of several thousand certificates should complete in under a minute on well-architected platforms.
Step 5: Deliver and Verify
Trigger email delivery to all recipients, either immediately or on a scheduled date. Monitor delivery reports to identify failed sends. These are typically caused by invalid email addresses in the data file, and they are resent individually where necessary. For platforms with QR verification, test the verification URL from a certificate to confirm the validation page loads correctly and returns accurate issuance details. Download analytics showing who retrieved their certificate and when to give the organizer a record of distribution that is useful for attendance verification requests and post-event reporting.
Common Problems With Manual Certificate Management
In the opinion of a writer representing and charting for Dryfta’s all-in-one event management software, I’d presume that manual certificate management is a problem in itself. Whether your event be one of 10 participants or 10,000 participants, when an economical and sound automated alternative like Dryfta exists, why stick to your old ways of manual certificate generation?
For creatures of manual habit, know everything you are risking with still being stuck on manual certificate management.
Manual Data Entry Errors
Typing 400 attendee names into a Word template produces misspellings at a rate that virtually guarantees complaints. A misspelled name on a certificate submitted to a licensing board or university portfolio is a document wasted. Correcting individual certificates manually, regenerating PDFs, and resending emails multiply the original time investment considerably.
Delayed Certificate
Attendees who register for a webinar expecting a certificate expect to receive it the same day, if not within the hour. Manual workflows that depend on an administrator’s availability after the event routinely delay delivery by days. Each delay increases the volume of support messages asking where the certificate is, adding to the post-event workload and leaving a negative final impression of an event that may have otherwise run exceptionally well.
Branding Inconsistency
When certificates are built individually in Word or Canva, minor variations accumulate: a slightly different logo placement, an inconsistent font, and a line break that wraps differently on one document. For organizations that issue certificates across multiple events or departments, visual inconsistency signals a lack of operational maturity. Standardized templates enforced through a dedicated platform remove this problem entirely.
Fraud and Verification Issues
A PDF certificate with no verification mechanism is straightforwardly forgeable. As professional certification requirements grow stricter and employers become more sophisticated about credential checking, unverifiable certificates carry diminishing weight. The absence of a QR code or unique certificate ID is increasingly a red flag for reviewers assessing professional development records, particularly in regulated industries such as healthcare, financial services, and education.
Scalability Problems
An event with 40 attendees managed manually is inefficient. That being said, an event with 4000 attendees managed manually is close to impossible. Organizations that start with manual workflows and grow without upgrading their certificate systems hit a wall at a volume that is difficult to predict in advance. The cost of retroactively issuing thousands of certificates that were never sent, because the manual process broke down at scale, is far higher than the cost of adopting an automated platform from the very first event.
Integration Limitations
Manual workflows need the support of the administrator to export a list from the registration platform and then import it into whatever tool is generating the certificates. The individual then ought to generate the PDFs, download them, and later email them, often individually. This kind of manual workflow leaves space for errors at every step of the way. Data can become corrupted, information can be backspaced by way of manual error, and atrocious amounts of time are eaten up only trying to rectify them. Platforms with native integrations to event management and LMS tools remove most of these handoffs and reduce the process to a single trigger.
How Participation Certificates Improve Event Engagement
Participation certificates are not merely another run-of-the-mill function in event management. On the contrary, these are real tools, with a real and tangible impact on attending individuals. On top of offering recognition for attending the event and a certain kind of motivation to return for another, participants are poised to engage more as a result.
Accredible points at an 83% increase in attendee engagement when offered participation certificates at the end alongside other post-event activities.
It is therefore reasonable to assume that, even as a standalone factor, participation certificates are motivating attendees to engage productively. Let’s take a closer look into how participation certificates, often dismissed as an addition, influence event engagement in notable ways.
Increasing Event Participation
The prospect of receiving a certificate for attendance is a documented driver of event registration, particularly for professional audiences who track continuing education credits, maintain professional portfolios, or need evidence of training completion for their employers. Webinars and workshops that advertise certificate issuance in their promotional materials consistently report higher registration rates than comparable events that do not. The certificate serves as a tangible outcome that justifies the time investment to a potential attendee weighing competing priorities.
Improving Post-Event Engagement
A certificate shared on LinkedIn extends an event’s visibility well beyond its attendee list. When a participant posts their participation certificate, every connection who sees it is exposed to the event name, the organizer’s brand, and the topic covered. Given that LinkedIn members interact with pages on the platform over two billion times per month and that personal posts generate significantly more reach than company page posts, organic certificate sharing by attendees can produce meaningful earned exposure for an event or organization with no additional marketing spend.
Enhancing Professional Recognition
Certificates that contribute to continuing education requirements or professional development records carry value that extends well beyond the event itself. For attendees in fields with formal CPD obligations, a verifiable certificate is a professional document they file and reference for years. For organizing bodies, issuing certificates that are accepted by accrediting organizations positions the event as a credible professional development resource and strengthens the case for future attendance.
Strengthening Community Building
Recognition creates belonging. An attendee who receives a personalized certificate that names them individually, names the event they attended, and carries the signature of the organizing institution is more likely to feel that their participation was genuinely valued. That sense of appreciation correlates with repeat attendance, higher engagement in post-event surveys, and a greater likelihood of recommending the event to a colleague. Alumni communities for conference series and training programs are built partly on this cumulative sense of recognition.
Supporting Sponsor and Partner Visibility
Co-branded certificates that carry sponsor logos alongside the organizer’s branding give sponsors tangible post-event visibility. A participant who receives a certificate, stores it in a portfolio, shares it on LinkedIn or submits it to an employer for continuing education credit carries that sponsor’s name through each of those touchpoints. For sponsors evaluating the value of event partnerships, verifiable co-branded certificates are a form of long-tail exposure that the event itself, however well attended, cannot provide on its own.
Create Certificate of Participation With Dryfta
Using the Certificate Builder tool, conference organizers can now generate customizable certificates for participants. It also takes care of the distribution with multiple distribution channels to choose from. Read on to know more.
- Import your Contacts: You can either add contacts one by one, or let them register on their through a public form. Optionally, if you already have their information in a spreadsheet, simply import the spreadsheet into your Dryfta account at once. Once your contacts are imported, you can assign different usertypes to them eg. participants, speakers, organizing staff etc.
- Design & Customize Participation Certificates: Go to Certificate Builder and start designing participation certificates for your attendees, students, speakers and general staff. You can design separate certificate for each usertype. When customizing the design of your certificate, you may also upload the conference/seminar’s logo, authorized signatory for the certificate, dynamic information about the participant, sponsors’ logos, additional information about the conference/seminar among other things.
- Display CE Credits & Custom information in Certificates: Using certificates to display CE credits? Go to Contacts and add CE credits in your participants’ profiles first. Then come back to Certificate Builder and use the shortcode {ce_credits} to display CE credits as received by participants in their respective certificates. You can also display custom information about participants including their organization, country and other info.
- Print Certificates in one Go: After you’re done customizing the certificate’s look and feel, simply choose a usertype and print certificates for all participants at once. You can also save the certificates in PDF format and print them later.
- Send Certificates through Email Broadcast: If you’re designing the certificates for an online event and your participants have joined in from across the globe, you can instead send certificates to your participants through email. After designing the certificate, select the usertype to whom you wish to send this certificate and click on Send Certificates button. On the next page, you’ll be asked to write a cover letter which would be sent along with the certificate.
- Track Automated Delivery Via Email: When ready, click on the Send Certificates button to send the certificates to the participants. Participants, after receiving the email, would be able to download the certificates. After sending the certificates, you can also access the email campaign reports to see who received and opened it.
As always, if you have got any feedback/suggestions, please do not hesitate to let us know in comments. To sign up for a free demo and explore Dryfta’s tools to generate certificate of participation, tap here.
Frequently Asked Questions (FAQs)
What is the best participation certificate generator?
For academic conferences and professional events where certificate generation is one part of a broader management requirement, Dryfta is the ideal choice. It offers straightforward bulk generation, a clean automated solution for email delivery and certificate generation natively.
How do I generate certificates in bulk?
Prepare a CSV or Excel file with one row per recipient, including name, email address, and any event-specific fields the certificate template requires. Upload the file to your chosen certificate platform, map the columns to the corresponding template placeholders, and initiate batch generation. The platform produces an individual certificate for each row. Most dedicated platforms complete batches of several thousand certificates in under a minute. Platforms like Canva and Adobe Express also support bulk generation via their Bulk Create features, though delivery must be handled separately.
Can participation certificates be automated?
Yes, event management platforms with integrated certificate builders, such as Dryfta and Zoho Backstage, can trigger certificate generation automatically when an attendee checks in and completes a session. Credentialing tools like Certifier and MixCertificate automate delivery once the batch is generated, sending each certificate to the correct recipient by email without manual intervention. LMS integrations allow training certificates to generate automatically when a course completion status updates.
How do QR-code certificate verification systems work?
When a certificate is generated, the platform assigns it a unique identifier and records the issuance details like recipient name, event, date, and certificate ID in a verification database. A QR code printed or embedded on the certificate encodes a URL pointing to that record. Anyone scanning the QR code with a smartphone reaches a verification page that confirms or denies the certificate’s authenticity by checking the code against the database. If the certificate has been altered or the QR code is missing, the verification fails. Certifier and MixCertificate both implement this mechanism.
Which certificate generators integrate with webinar platforms?
Dryfta supports attendance-based certificate issuance for sessions managed within the platform, including virtual sessions. Zoho Backstage integrates with Zoom for virtual event delivery and can trigger certificates based on session completion. Certifier’s API and Zapier integrations allow connections to most major webinar platforms. MixCertificate can process attendance data exported from any platform that produces a CSV attendance report.
What is the difference between digital credentials and participation certificates?
A certificate of participation confirms that an individual attended a particular event. They are the standard documentation for conferences, webinars, and workshops. Digital credentials, on the other hand, include more features like open badges and verified digital certificates. They are designed to be portable, machine-readable, and verifiable against a credential issuer’s registry.
Can I create branded certificates for events?
Yes, you certainly can create branded certificate of participation when associated with the right platform for your needs. It is important for the branding to remain consistent across bulk generation. Dryfta, Certifier, MixCertificate, and Zoho Backstage all allow logo uploads, custom color schemes, and font choices within the certificate builder. Canva and Adobe Express offer the most extensive design customization but lack the automated delivery mechanism associated with full-fledged event management softwares like Dryfta.
Which platforms offer free certificate generation?
More design-oriented platforms like Canva and Adobe offer free tiers up to a certain generation limit. While on Canva, it is possible to generate unlimited individual certificates, bulk generation mechanisms are placed beyond a paywall. Adobe also paywalls selected templates, offering only a few standardized ones for free users. Certifier’s free plan supports up to 50 certificates with access to the core builder and email delivery. More design-oriented platforms like Canva and Adobe offer free tiers up to a certain generation limit. While on Canva, it is possible to generate unlimited individual certificates, bulk generation mechanisms are placed beyond a paywall. Adobe also paywalls selected templates, offering only a few standardized ones for free users. Certifier’s free plan supports up to 50 certificates with access to the core builder and email delivery.